
I’ve just finished getting my laptop set up the way I like it, including maximising the RAM and upgrading the screen. I opened it up to use it, and the screws on the hinge tore through the plastic.
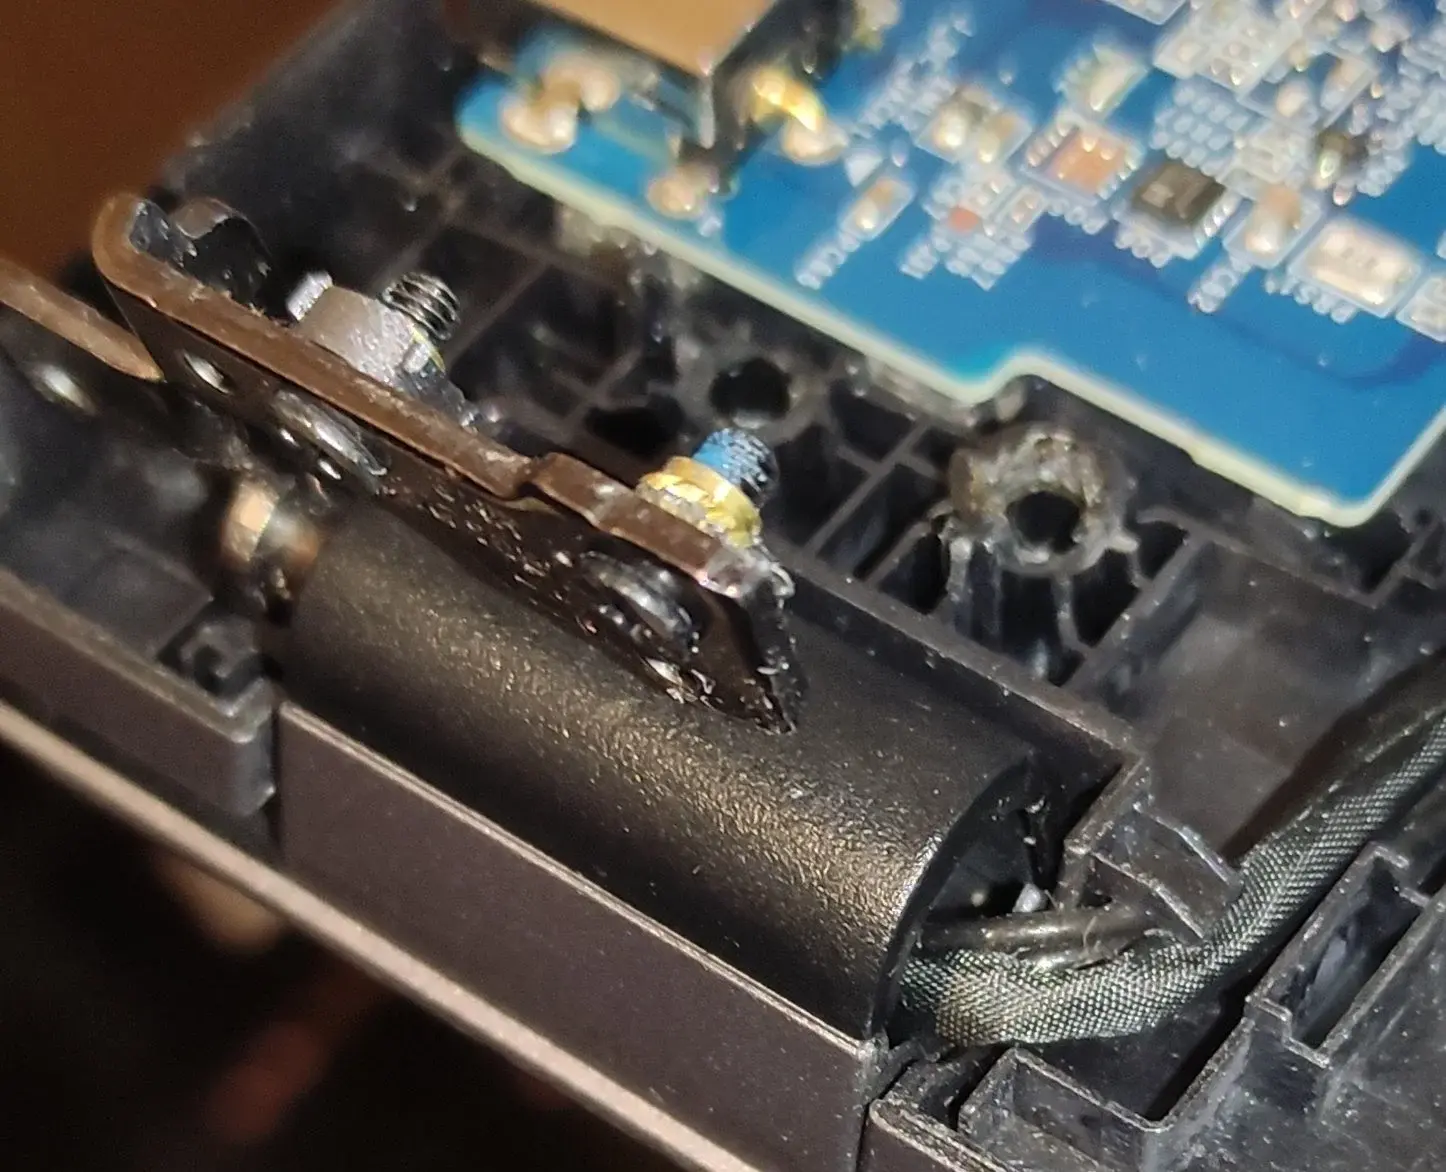
To top it off, the plastic on the bottom of the laptop, the side that’s been removed here, has also broken.
My wife definitely didn’t drop the laptop while she was tidying up though…
EDIT: Apologies all, I’m having trouble with Lemmy today, and it’s not letting me reply.
I’ll try to reply tomorrow, but in the meantime;
It’s a Stonebook branded Clevo n751BU, a 7th gen i5. It’s held up respectably well until it appears to have been knocked in the corner where the hinge is. The plastics on both sides of the hinge have given out.
I’ve ordered a replacement base, but the palm rest which is pictured is not available anywhere that I can find. I’m going to dismantle the hinge to clean and oil it, then reassemble it slightly less tightly, and epoxy the screws into place. The reason for taking it apart in the first place was to add a third hard drive. It has an nvme drive, and I had two HDDs going spare that can hold my documents and music. They’re being synced now as I was having problems doing it remotely, but once they’re in they can be managed with Syncthing. The laptop shouldn’t need to come apart agin afterwards :)
I’ve been building and repairing computers and laptops for about 30 years, so I’m comfortable with completely stripping it, and can use it as an excuse to give everything a clean again. Short of replacing these HDDs with SSDs, there’s nothing else that can physically be upgraded, so I’m half tempted to glue it shut so that I don’t get tempted again :D
Honestly, this looks like it would be repairable with the appropriate sized heat-press insert, and a longer screw. Granted, things are pretty tight in that area; but it looks like there is enough beef left on the underside to repair this ‘properly’.
It’s hard to see from this photo, but the area below the insert is quite thin. It’s a bit wider than the screw, but with some supports. I don’t know if there’s enough to take a new insert.
My plan is to clean everything up, then epoxy the existing inserts in place, screw the hinge in, then put some epoxy around that too, leaving room for the other screws that come from the other side of the case.